
In today's world of over connectivity, one needs to be sure about the identity of those accessing services or applications. Vodafone's Number Verify API provides an additional tool for developers looking to secure their user's right of access.
This API could be used in conjunction with other solutions, such as PIN codes or one-time passwords (OTP). The latter, whilst becoming the almost de facto second step for two factor authentication (2FA), has some drawbacks: it adds friction to the verification process and is also not impervious to social engineering.
In this short tutorial, you will learn the steps necessary to make a successful call to the Number Verify API, presenting code snippets as well as explanations about some of the concepts that integrate this solution.
But first, a little bit more about the star of the show.
Number Verify API, a quick intro
Number Verify is a functionality provided by Vodafone through an API that checks if the phone number being used by the customer to register for your service or app matches the one provided by them. This happens at the network level, so it provides a frictionless and secure journey to the end user.
Use case examples
- Users registering through any sort of process that would require 2FA, such as financial services or ride hailing apps.
- True passwordless login, with no need for usernames or passwords.
- Ensuring the identity of the user during password resets.
- Frictionless reauthentication for users already registered.
Requirements
For the call to Vodafone's Number Verify API to be successful, it needs to be done from within Vodafone's network, so you will need to have a Vodafone SIM card with a data plan available to you. You will also need to get a client ID and client secret for your app. This can be done by creating an app in the "My Apps" section of the Developer Portal.
In terms of programming languages, this post was written using NodeJS for the backend, but the beauty of API calls is that you can use whichever language you are more comfortable with to make them. The frontend is also irrelevant for the tutorial, as its only job is to collect the input (mobile number) and provide feedback to the user, so feel free to use whichever you like. For this example, Express was used.
Setting up the backend
Installing the necessary packages
For the API calls, the server will use node-fetch, so make sure to install the dependency by executing the following:
$ npm i --save node-fetch
And that is it! Let's move on to the coding!
Server code
As described on the "Additional Information" section of the Number Verify API, it uses a three-legged OAuth flow. It involves three parties: the end-user (resource owner), the client (the third-party application) and the server (authorisation server). The flow is as follows:
- The client get a set of temporary credentials from the server (an authorisation code).
- The code is then exchanged for an access token.
- With the access token, a request is sent to try and match the provided mobile number.
Getting the authorisation code
The following query parameters are mandatory for this GET request:
-
redirect_uri: this is validated by the API gateway against a list of original redirect URIs registered by the developer for the application.
-
client_id: this is generated when an app is created.
-
scope: list of ASCII string for OAuth 2.0 scope values. Authorisation request MUST contain the following scope: openid mc_vm_match_hash.
-
response_type: only code is supported as response type.
-
state: used to maintain state between request and callback.
-
acr_values: "Authentication Context class Reference", space separated strings that specifies the ACR to be used during authentication processing. More information can be found here. The value MUST be 2.
-
version: string value used to identify the profile version. It MUST contain mc_di_r2.v2.3.
-
nonce: value used to associate a client session with the ID token. It SHOULD be unique per session to mitigate replay attacks.
Additionally, there is the optional header parameter vf-trace-transaction-id and the optional query parameter correlation_id, respectively a unique identifier for each request and for each transaction, so that the association between /authorize, /token and /premiuminfo request/responses can be established.
Here is the code for the function that requests the authorisation code:
import { v4 as uuidv4 } from 'uuid';

const AUTH_URL = 'https://api.vf-dmp.engineering.vodafone.com/mobileconnect/deviceinitiated/v1/authorize?';
const REDIRECT_URI = 'https://www.example.com/consent';
const CLIENT_ID = '<CLIENT_ID_FROM_DMP>';

async function clientAuth() {
  // add headers:
  var myHeaders = new Headers();
  myHeaders.append("vf-trace-transaction-id", vfTransactionId + uuidv4());

  // configure request parameters:
  const params = {
    client_id: CLIENT_ID,
    redirect_uri: REDIRECT_URI,
    scope: 'openid mc_vm_match_hash',
    response_type: 'code',
    state: uuidv4(),
    acr_values: 2,
    version: 'mc_di_r2_v2.3',
    nonce: uuidv4(),
  };  // set up request options:
  var requestOptions = {
    method: 'GET',
    headers: myHeaders,
    redirect: 'follow'
  };

  // build the request URL:
  const requestUrl = AUTH_URL + new URLSearchParams(params).toString();

  // fetch the response:
  const response = await fetch(requestUrl, requestOptions);
  // get the url parameters from the response URL
  const urlParams = new URL(response.url).searchParams;
  var retVal = {}
  // if there isn't a `code` field on the parameters, set retVal.error to true and copy the error description
  if (!urlParams.get('code')) {
    retVal.error = true;
    retVal.val = urlParams.get('error_description');
  }
  // else, set retVal.error to false and copy the code
  else {
    retVal.error = false;
    retVal.val = urlParams.get('code');
  }
  return retVal;
}
One thing to keep an eye on is that this flow involves HTTP 302 redirects. The last one of those will contain the redirect_uri provided and the authorisation code, if the call is successful. Because the URI used in this tutorial (https://www.example.com/consent) does not exist, the call returns HTTP 404, but with the auth code in the redirect_uri.
Getting the access token
The POST request to retrieve the access token takes a string, consisting of the client ID and the client secret encoded in base64 as basic Authorization header parameter and one optional parameter, vf-trace-transaction-id. As explained on the previous session, the latter is a unique identifier for each request.
For the body, there are three mandatory key/value pairs:
- redirect_uri: it should be the same value which was provided in the previous call.
- grant_type: it MUST be authorization_code.
- code: the authorisation code retrieved in the previous call.
Here is the function to retrieve the access token. It takes the previously retrieved code as argument:
import { v4 as uuidv4 } from 'uuid';

const CLIENT_ID = '<CLIENT_ID_FROM_DMP>';
const CLIENT_SECRET = '<CLIENT_SECRET_FROM_DMP>';

const TOKEN_URL = 'https://api.vf-dmp.engineering.vodafone.com/mobileconnect/deviceinitiated/v1/token';
const REDIRECT_URI = 'https://www.example.com/consent';

async function accessToken(code) {
  // encode client ID and secret
  const encodedIdSecret = Buffer.from(CLIENT_ID + ':' + CLIENT_SECRET).toString('base64');
  // add headers
  var myHeaders = new Headers();
  myHeaders.append('Authorization', `Basic ${encodedIdSecret}`);
  myHeaders.append("vf-trace-transaction-id", vfTransactionId + uuidv4());

  // body parameters
  var urlEncoded = new URLSearchParams();
  urlEncoded.append('redirect_uri', REDIRECT_URI);
  urlEncoded.append('grant_type', 'authorization_code');
  urlEncoded.append('code', code);

  // configure request options:
  const requestOptions = {
    method: 'POST',
    headers: myHeaders,
    body: urlEncoded,
    redirect: 'follow'
  };

  // fetch the response
  const response = await fetch(TOKEN_URL, requestOptions);

  const responseJSON = await response.json();

  var retVal = {}

  // if there isn't a `access_token` property in the response, set retVal.error to true and add an error description
  if (!responseJSON.access_token) {
    retVal.error = true;
    retVal.val = "It wasn't possible to retrieve an access token."
  }
  // else, set retVal.error to false and copy the access token
  else {
    retVal.error = false;
    retVal.val = responseJSON.access_token;
  }
  return retVal;
}
Verifying the number
Now, with the access_token in hand, all that is needed is the hashed mobile number and your app can proceed to perform the final call to the Number Verify API to check if the customer trying to authenticate is indeed using the same number as the one they provided during the registration process.
First, a quick function that takes a string as argument (the mobile number) and returns it hashed:
import crypto from 'crypto';

// function to produce the hash of a given string
function hashNumber(number) {
  return crypto.createHash('sha256').update(number).digest('hex');
}
Here are the mandatory fields for the POST request: it takes the hashed mobile number as part of the request's body. This must be inside a mc_claims object and be the value of a device_msisdn_hash key:
'mc_claims': {
  'device_msisdn_hash': hashedMobile
}
Additionally, there are four mandatory headers:
- vf-trace-transaction-id: as described previously, a unique identifier for each request.
- Authorization: the token retrieved on the step above, preceded by "Bearer".
- Content-Type: it MUST be application/json.
- Accept: it MUST be application/json.
The function that performs the request takes the hashed mobile number and the token retrieved in the previous step and looks like this:
import { v4 as uuidv4 } from 'uuid';

async function verifyCall(hashedMobile, token) {
  // add headers
  var myHeaders = new Headers();
  myHeaders.append("vf-trace-transaction-id", vfTransactionId + uuidv4());
  myHeaders.append('Authorization', `Bearer ${token}`);
  myHeaders.append("Content-Type", "application/json");
  myHeaders.append("Accept", "application/json");

  // add body
  var myBody = JSON.stringify({
    'mc_claims': {
      'device_msisdn_hash': hashedMobile
    }
  });

  // configure the request options
  var requestOptions = {
    method: 'POST',
    headers: myHeaders,
    body: myBody,
    redirect: 'follow'
  }

  // fetch the response
  const response = await fetch(VERIFY_URL, requestOptions);

  const responseJSON = await response.json();

  // return the result of the verification (true or false)
  return responseJSON.device_msisdn_verified;
}
Putting it all together in a router
Now that the necessary functions have been created, they can all be put together inside a router, for a webapp, like so:
app.post('/verify', async (req, res) => {
var code, token;
// retrieve the authentication code
const auth = await clientAuth();
// test for errors
if (auth.error) {
// log the error
console.error('Error:', auth.val)
// return the `auth` value to the frontend
res.json({ auth })
} else {
// retrieve the authentication code
code = auth.val
// retrieve the access token
const tokenReq = await accessToken(code);
// test for erros
if (tokenReq.error) {
// log the error
console.error('Error: ', tokenReq.val)
// return the `tokenReq` value to the frontend
res.json({ tokenReq })
} else {
// retrieve the authentication token
token = tokenReq.val;
// hash the mobile number; in our example, this is being provided by the user, via the front end
const mobileNumberHashed = hashNumber(req.body.mobileNumber);
// verify if the number performing the operation matches the one provided by the frontend
const verify = await verifyCall(mobileNumberHashed, token);
// prepare the return value depending on the result of the verification
const result = verify ? 'matches' : 'doesn\'t match';
// return the result to the frontend
res.json({ result })
}
}
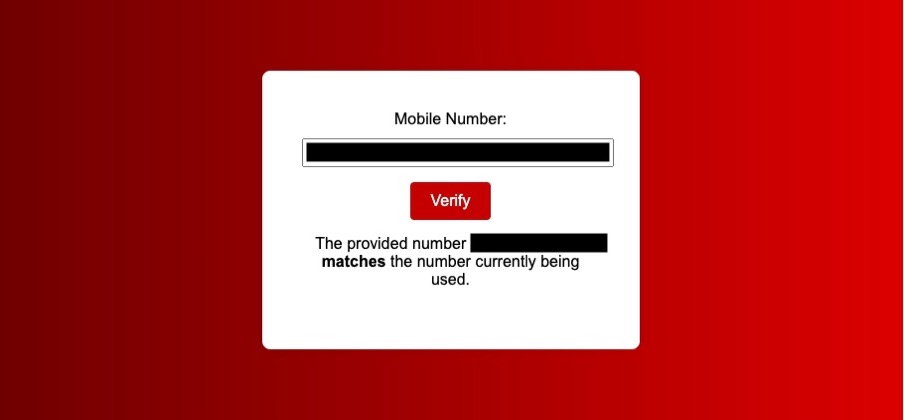
});The experience for the end user would then look something like this:
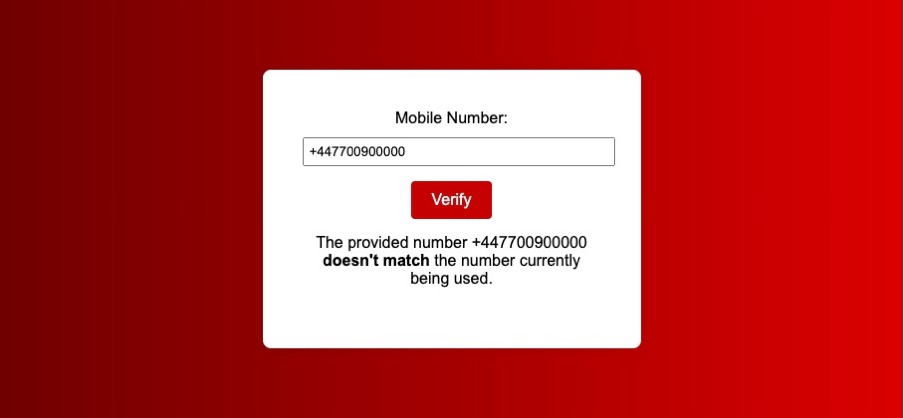
Or
Final considerations
This blog post showcased how to programmatically call the Number Verify API to check if the number being used to access the webservice or app is the same as the one provided by the user. It demonstrated how to navigate the three-legged auth workflow and successfully retrieve an authorisation code and an access token, needed to authenticate and make the call to the service.
The entire program that was written for the purpose of this tutorial (minus the client ID and secret, but plus the frontend) can be found at this repository. If you have any questions, or is interested in reaching out to us, please feel free to do so through the form located here. Looking forward to hearing from you!
